Mar 2016
more experiments in point cloud reconstruction
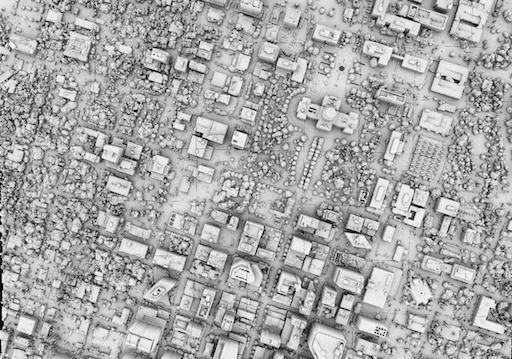
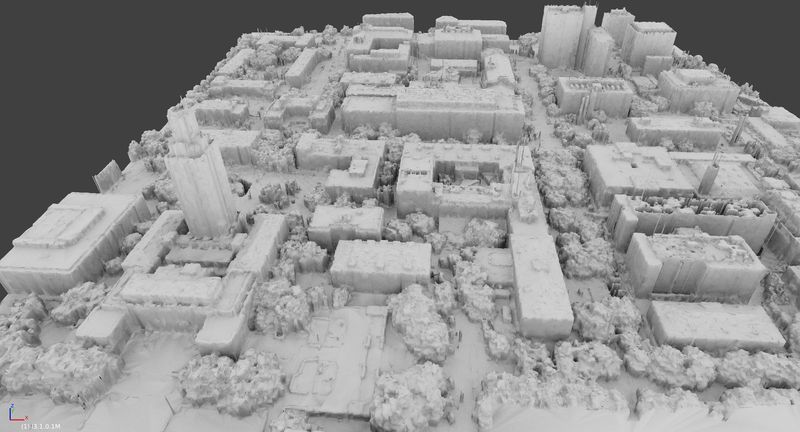
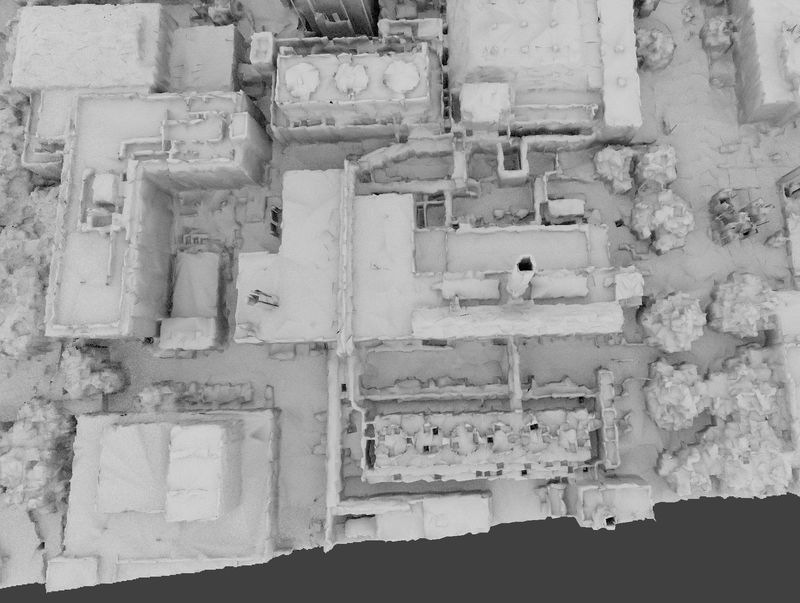
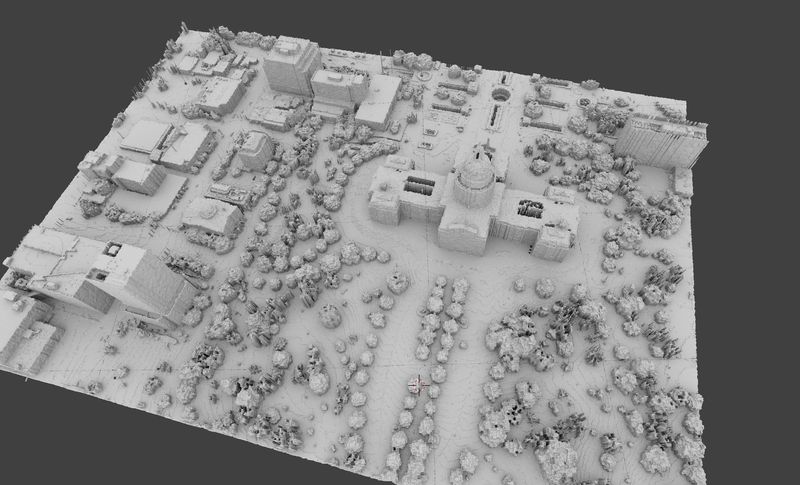 [Texas State Capitol in Austin]
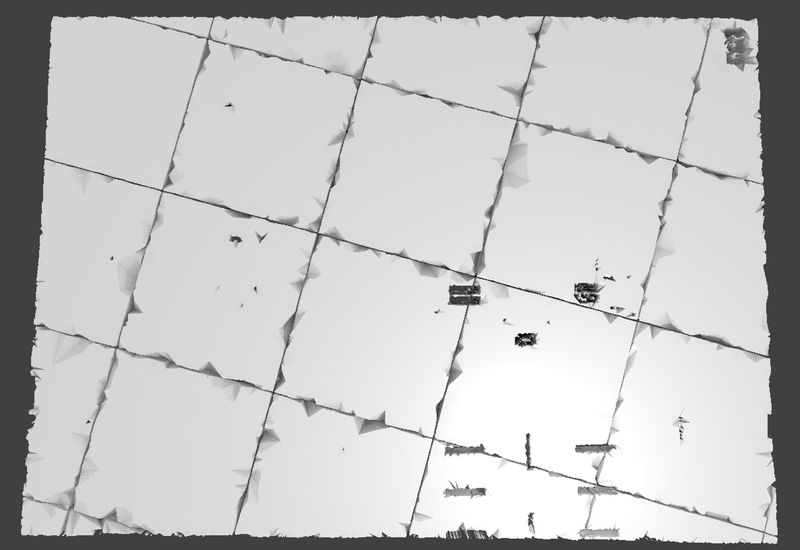
Issues from last time :
Tile Artifacts
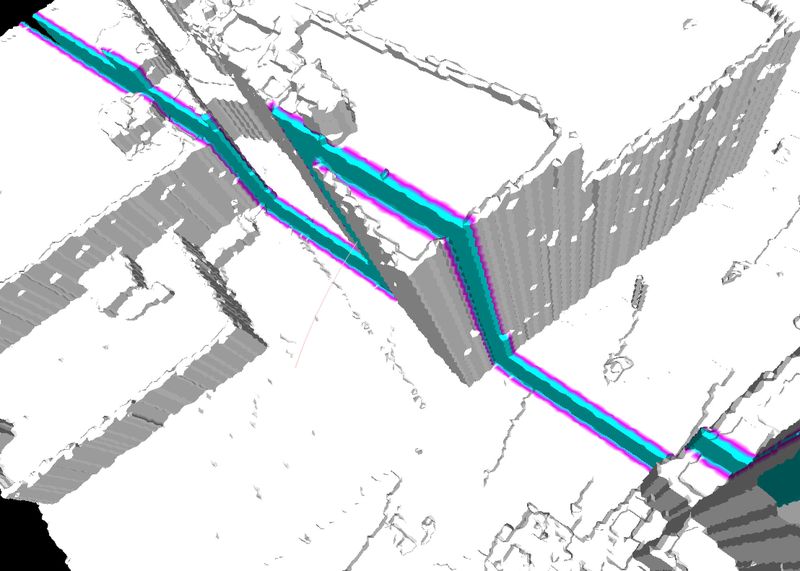
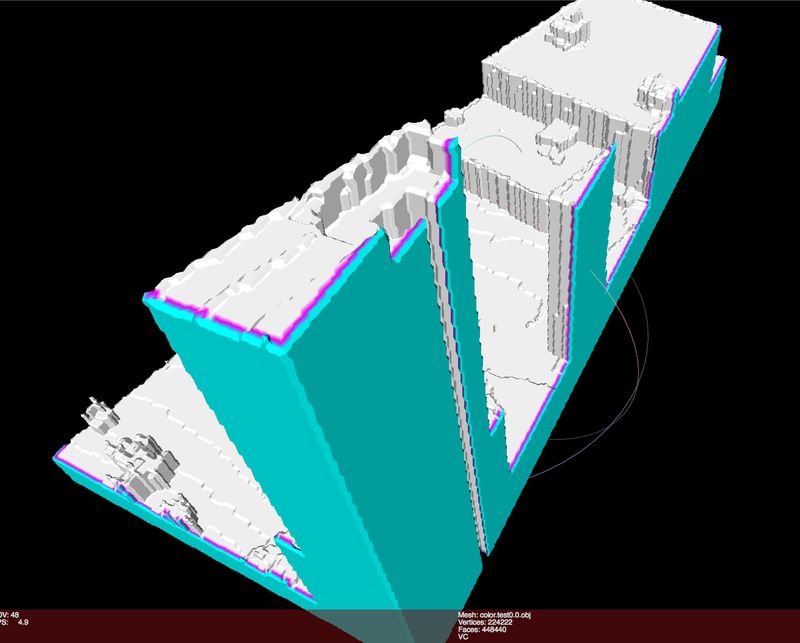
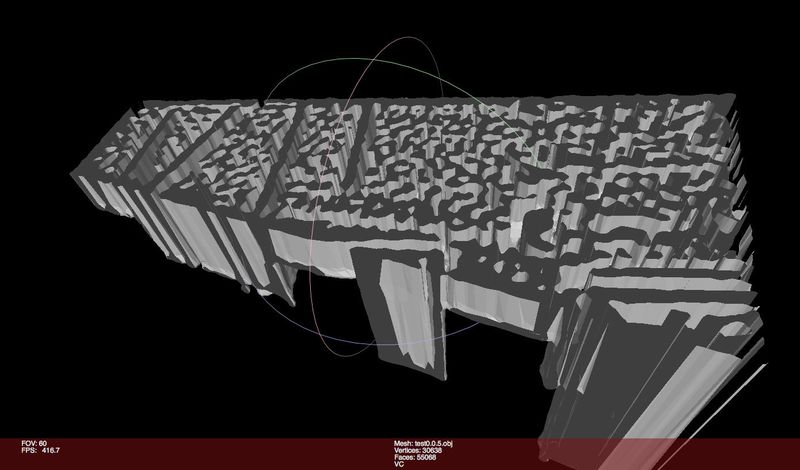
 [Bottom side of mesh]
First off tried to classify the edges of a mesh and remove the outer shell parts. That’s a ton of triangles I could save!
Then started doing a k - nearest neighbors search between neighboring meshes, and try to tesselate those. But because these has been decimated the vertices were irregular leading to inconsistent merging.
I started using pyMesh Boolean operator like so
merged = pymesh.boolean(f1, f2, operation=“union”)
which usually merged tiles with minimal artifacts! As long as there was enough overlap in the tiles.
Parametric box fitting! (to the volume or the point set)
this could greatly compress the mesh, and allow me to classify points as trees or buildings! then do other cool stuff?
This was a little ambitious! maybe next time…
Better AO
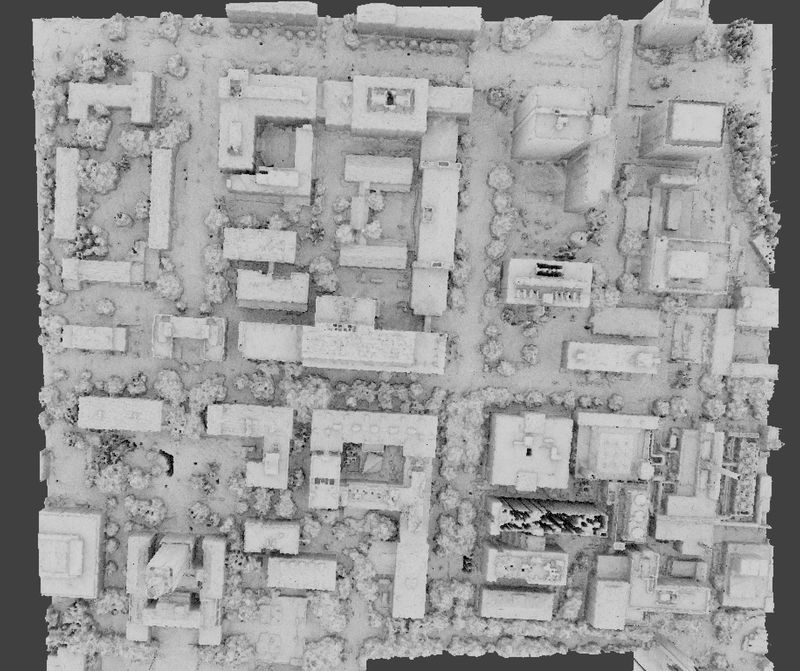
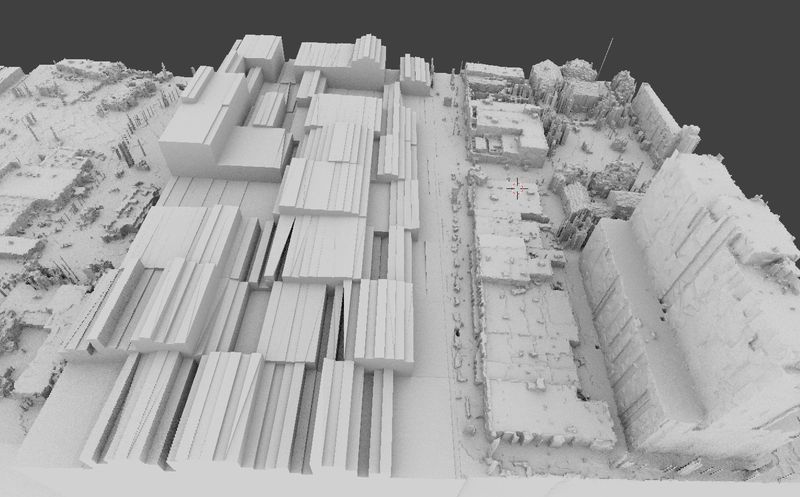
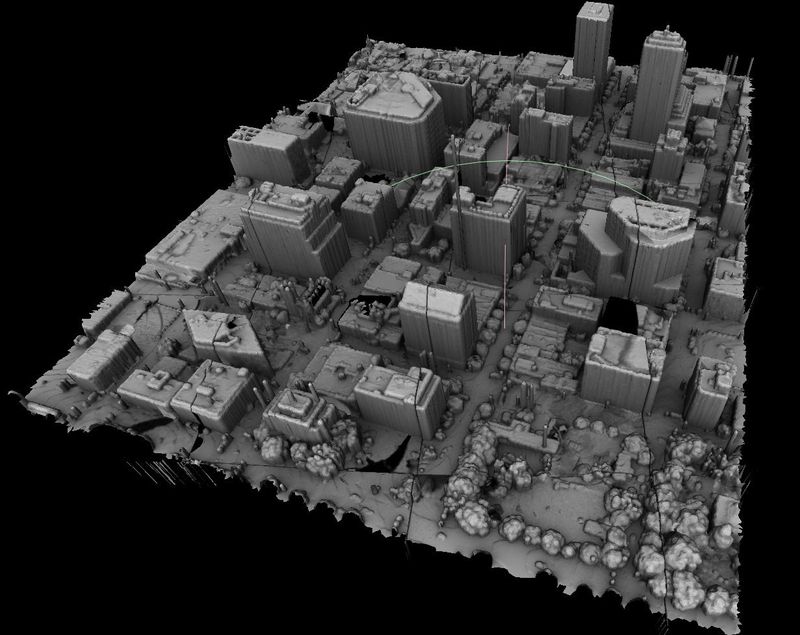 [Congress Ave in Downtown Austin, Texas]
Why reinvent the wheel! I have reconstructions to do! Actually I found a pretty sweet AO generator. The tile artifacts totally destoryed the mesh topology so the UV wrapping didn’t work the best, and took forever. But pretty useful tool if you have a decent mesh ! Check out prideout’s aobaker
Diferent subjects
- GeoTiff are way easier to process into a mesh, because they already have a regular grid and you basically just have to create two triangles for each pixel connecting the neighbors, and set each point to the value of the pixel. No volumes necessary. But i’d like to do create visualizations of a lot of different cities.
Time lapse:
Austin is growing super fast and this scan is already 5 years out of date. Now, where could I get an updated scan data… Google maps? Apple Maps? Going to try using a GLTrace to rip out the vertex positions… is that allowed?
Update: Whan I have my WebGL inspector for Chrome enabled! 3D maps don’t work… suspicious. Wondering if they did this on purpose for proprietary information reasons, or it’s a bug with the inspector driver. Now that I have a windows desktop, maybe I can use apitrace to trick Chrome…
Other stuff I started looking into:
Improved Volume filtering
The objective here is to get maximum detail, smooth interpolation, no gaps, etc. I came up with a few techniques, each with their pros and cons.
Low pass / Isotropic Diffusion
Basically take each point in the volume and make it fill a sphere somehow. To accomplish this, I mark cells that a point lands in with a very high number. Then run a 3D gaussian blur on the volume. This keeps my field mostly continuous, so reconstructing the isosurface is smooth.
Anisotropic Diffusion
The Gaussian is one solution to the heat equation, but we don’t want to blur edges, so we should weight the gaussian by the gradient. I implemented this wrong using the laplacian early on and moved on. Gave me some weird patterns inside the volume when I ran marching cubes. This is probably part of the optimal solution, but it still doesn’t fill holes. I will revisit this with the right equation next time …
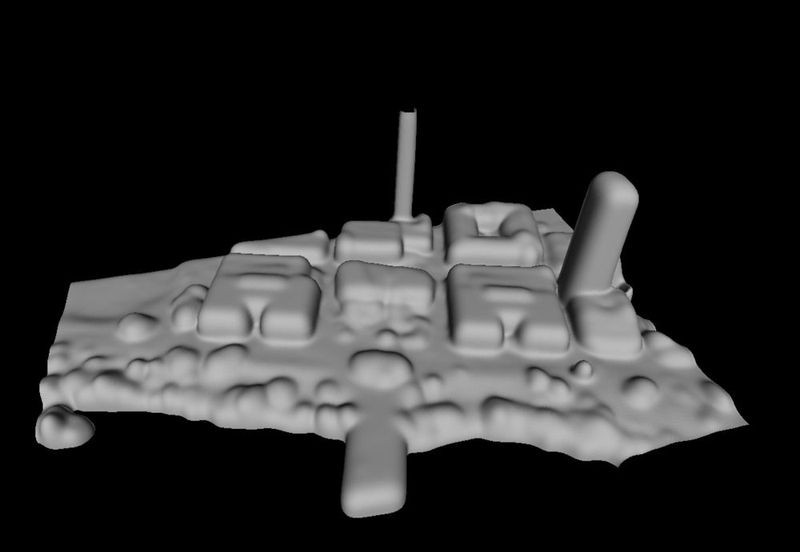
 [capturing individual water pipes at UT Austin campus]
Dilation-Erosion
This is what I finally came up with, which does fill holes, but leaves some blocky artifacts. This could possibly be improved by changing the morphological operator, but can’t be removed entirely.
The idea is to create the grid at a much higher sample rate than the points are. Then do the same grid filling with the points you have. There will be tons of gaps where points didn’t happen to land, but you just dilate the whole volume, and then erode it the same amount.
I got some really sick detail using this technique. Probably, you want to then blur this high-res grid after that, i just didn’t get that far. Maybe the Anisotropic Diffusion comes in handy here
decimation glitches!
Turns out if you are using floats to store lat and lon, the open source decimator I was using kind of craps itself in some kind of precision thing. Looks cool though. My workaround was, take the mesh and translate it so the center is at the origin, run the decimator, and then apply the same inverse translation when finished. This caused me some headaches though, since if my program crashed or I force-quit then I could have model chunks in different fraes of reference D:
Conclusion
I still wasn’t able to get a huge reconstruction of the entire data set with these techniques, although I’m closer! The main issue is that the dataset is so big and volumetric processing so memory intensive that development time was just slow. Couple this with the fact that the third party pymesh lib would sometimes fail to merge, or there would be tiles in different frames of reference or bad states in my file system, and it would take a while to tell if something was screwed up. Now I have a beefy desktop with GPU though, so GPU accelerated marching cubes is coming up next! Hopefully I can even view the results in realtime for interactive merging and failure detection